Showing posts with label cq. Show all posts

Friday, October 8, 2010

Arlene's Basically Beaded RR and some fun in the mountains!


I arrived home in the wee hours of Tuesday morning after a wonderful time in Salt Lake City with Cathy K.  Then we set out on  a scenic drive through Wyoming, and arrived in Estes Park, Colorado to spend from Thursday to Monday morning with the CQI September Shenanigans Group.  What fun we had!  Some of the ladies I knew from the 2009 Retreat, but we had grown in number and I enjoyed putting names to Internet faces for the new ones.  There were 18, and on Saturday, 19 of us teaching, learning, sewing, beading, etc. etc. in a spacious 6-bedroom cabin, 7,000 odd feet elevation in the Rocky Mountains. The four guys in charge of CQI did a wonderful job of organizing the Retreat - thank you to Kerry, Lesley, Cathie and Hideko. 


Above is Arlene's basically beaded RR block that spent some time up in the mountains while I worked on it.  Below are close ups. 


This is a bouquet of lavender.


Feather stitch  with a few added fantasy flowers!


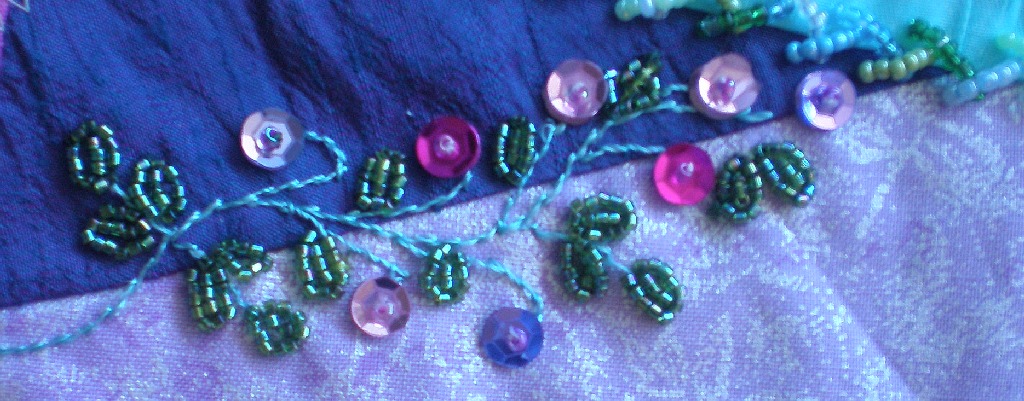
A seam of sequin flowers and beaded leaves


Glass flower


Beaded herringbone


Monday, March 22, 2010

Sunday, March 14, 2010

Elijah's birth announcement block


In between the CQI Round Robins that I am working on, I have been trying to get caught up with these announcement blocks for my five grandchildren.  This is Elijah, my youngest at 4 months.  The two next in age, Brynn, one year and a bit, and Josh, 2 years and a bit I have completed.  The other two, Jack nearly 7 years old and Caleb 3, were born before I began crazy quilting, so I am playing catch up.  Jack's is almost finished and will be featured soon! 

Wednesday, August 26, 2009

Deanna's Pines Group - Yellow Study moving on

This is Deanna's almost finished block with Vicky, Reneta, Cathy and my work. It's going to Daphne next. I've not worked in yellow much, and it's not my favourite colour, but I was loving it by the end of the first seam.
Here's what I added to the block. Some scallops. I wanted to do more to this patch, but couldn't make up my mind on what else to add. Perhaps Daphne will finish it off!


The paisley was fun to do. I also did the seam above it.


This began with small straight stitches. Then I wove six strands of sparkly green thread in and out of the straight stitches, and added a small green pearl. After that three lazy daisy stitches in orange DMC pearl #8 and in between those three straight stitches in one strand of gold sparkly thread with a gold bead on each stitch.


A little patch of chicken scratch on the gingham patch with a pea-pod seam below.


I filled this patch with herringbone and small cupped sequins.
This is the final Pines block that I will work on. What a variety there was in this group! It was great fun!


Friday, August 21, 2009

Daphne's Pines block on it's way home.

This Daphne's finished block. It looks great in reality, the photo doesn't do it justice. Last year we were in another RR and her block was a match to this one with shoes and boots. So the pair of them will look great together.
I worked on this clutch purse. Wide orange satin ribbon with big orange sequins and green seed beads keeping the pleats in place. Seed bead border on the orange fabric. Gold trim and a green sequin flower as the "button". And various beaded bits decorating the orange fabric. It was lots of fun to do - great colours together.


Saturday, August 15, 2009

Whatever Goes RR - Pines Group

My block is home and it's beautiful. The Pines ladies that worked on it are Vicky, Reneta, Deanna, Daphne and Cathy. I've taken some close up photos to give you an idea how lovely their work is.
The spider and web and pink and green seam are Vicky's work.

Vicky also embroidered this pretty seam.
This lovely assortment of flowers and the purple beaded seam on the left are Vicky's work too. Deanna embroidered the delicate pink beaded feather stitch.
Renata made this lovely cluster of pearl flowers.
The seam of silver and pearl flowers are Daphne's contribution, the purple seam is Cathy's. I couldn't find any mention of the purple and green bead seam so I can't give credit.
Daphne embroidered this gorgeous silk ribbon bouquet.
The hearts and flowers seam and the corner embroidery is Deanna's lovely work.
This seam is Cathy's.
This pretty purple cluster is also Cathy's.More lovely embroidery from Vicky.
Thank you all so much for your lovely work. This block is a real treasure and will be part of a wall hanging soon.


Thursday, April 16, 2009

Cathy's Cowboy Block

Cathy's cowboy block has made it's first stop at my place. It's part of the "Favourite Things Round Robin". It's totally brown except for a great picture in the middle of a cowboy on a hill with his horse, looking at his cattle in the distance. The all brown block was intimidating at first, and it took me a few days to get going on it. I'm not finished yet, but here is some of my stitching.


The trees are wrong, they should line up with the posts on the fence, so they will have to come out. Also I see a few red tacking stitches that I missed. I still have some more to go on the block, but rather than be a worry to do, it's become fun!

Friday, April 3, 2009

"Sparkle"


Her name is "Sparkle" and she's my newest dotee, made from a baggie swap at Swapbot from Sandy. In the baggie was everything you see and more! My swap partner made the adorable face which I just love.

Friday, March 27, 2009

Whatever Goes RR


This block began it's journey today to Deanna in Minnesota.
I didn't do a stitch on it before it left here. The colours are lilacs, purples and pale green. It will be back home in August if all goes well!!
Over the past year I've accumulated a few blocks. Below are two scenarios using the block above. One is using three lighter coloured blocks to make up a group of four. The other is a six block group using lighter and darker blocks. The background fabric is a dark eggplant/purple colour. Do you think that the dark blocks in the 6-group dominate too much?

Monday, March 23, 2009

Coffee Sleeve

I made a coffee sleeve for a swap on crazyquilters-ca, a Canadian group that I belong to. It was my first attempt and a learning experience. I had another go and took photos at every stage, so it is an "on the fly" tutorial. Here it is finished.


These are the small and large sizes for a Tim Horton coffee.


I used the large cup, trimmed the top and bottom, cut about 1" off the top and 1" off the bottom., and cut straight down the seam of the cup. Then I marked on the pattern a 1/2" seam.
(Note: I didn't need this seam allowance because I added it on to the muslin as you will see below.)


I pinned the pattern to muslin and marked a line around the pattern and a cutting line on the muslin 1/2" from the pattern.


Here's the muslin with the solid line being the actual size of the sleeve, and the dotted line the seam allowance. The extra fabric was my insurance, but was not needed.


Here I have placed the first piece of fabric (black) on the muslin.


I added a second piece of fabric, placed the two right sides together and sewed through the three fabrics. This photo shows the two pieces of fabric pressed and ready for the third.


The right sides of the second fabric and grey patterned piece of fabric are together ready to be sewn.


Seam sewn and excess black fabric trimmed.


Grey fabric sewn.


Next piece of fabric pinned, ready for sewing.


Fourth piece, sewn, ready for pressing.


As each piece of fabric is added, I trimmed the previous fabric to the shape of the muslin. I added two more pieces of fabric using the same method as before.


Trimmed


Embellish


I cut out a piece of black felt in the shape of the original pattern, pinned it to the embellished piece and tacked over the seams. I trimmed the seams to a bit more than 1/4".


Pin it around the paper cup. Neatly sew together. Embellish the joining seam. This is the smaller cup as I had cut up the large size for the pattern.


Cut out the lining with about 1/2" seam allowance. Sew in place.


Finish inside join.


Finished. This is the sleeve on a large Tim's cup. Just a note to say that the patterned grey fabric and the striped fabric are both from the skinny ends of men's ties.