Showing posts with label before and after. Show all posts

Tuesday, May 24, 2011

OOPS, Part 2: Before and after

Here is the first completed Outside Oslo Project Status (OOPS) report using Jessica Jones' newest fabric line. (A great place to purchase Outside Oslo is Marmalade Fabrics).

The "before" picture. I picked this up at a garage sale a couple of weekends ago, envisioning more fabric storage space for my sewing room. It came at a drastically reduced price because "the leg was broken." Turns out the legs screw in, and it just needed to be tightened! I thought the seller would ask about $15 and I was prepared to offer $10. However...she started the bidding at $2. Yes, you read that correctly. $2!! I felt a counter-offer on my part was not really in order...
In case you are wondering, before I get started on my little tutorial, here is a bit of information. There is an interior height of 9 inches (not including lid and also not including the legs--when you add those it stands about 18 inches from floor to top of lid), width of 19 inches and depth of 16 1/2 inches.

The second thing you need to know is that I had a wild idea that I could "do it all by myself"--that thought probably stemming from the fact that I spend a lot of time with 3- and 4 1/2-year-old grandchildren and hear that phrase repeatedly. While it probably IS possible, I highly recommend having someone willing to help you. Mark generously agreed to be that someone.

Part 1: Deconstruction.

The idea is to take it apart, and then put it back together in the opposite order. The legs came off first. Mark made this cool little painting rack by drilling some holes in a scrap piece of lumber.


We had some charcoal spray paint with a metallic finish--nothing too glitzy and just the perfect color for the fabric we were using. I did purchase some Kilz primer in a spray can. Hated it. We thought we shook it up long enough but still it came out gloppy. If I were doing it again, I would just roughly sand the legs (as we did), skip the priming stage because it's not like the legs are getting a lot of wear or anything, and then just spray several coats of the finish paint.  Because of the gloppiness, a couple of the legs didn't have a smooth finish, so we put them in the back of the stool.


Next we took off the hinges from the back and then all the little strips of wood that covered the raw edges of the fabric on the inside lid and bottom.

I can't tell you how gross this fabric was. It practically disintegrated when touched and made me feel the necessity of having hand sanitizer nearby. We removed all the staples and then used the fabric as a template.
This is what the lid and bottom looked like after we got all the fabric removed. The lid was padded with a little bit of foam; we used the original foam rather than replacing it.

Part 2: Putting it back together:

At this point, I laid my new fabric wrong side up, got out my sharpie pen and traced around the fabric we removed from the lid, cutting the same notches out of the four corners.

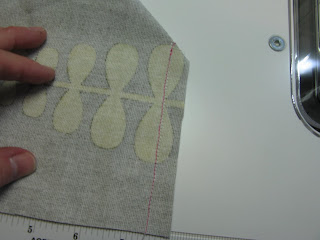
Next came the sewing. This is the ONLY sewing, and it involved matching the notched-out edges right sides together and sewing a 1/2-inch seam.

Each corner looked like this when it was turned right-side out again.

I did that to each corner and it fit like a glove over the top of the lid. This works great because otherwise you would have to do kind of a miter fold on the outside and staple or tack it down somehow. This eliminates all that fabric bulk. Then it just involved folding the raw edges to the inside of the lid, stapling it down, stapling the little wooden strips back on to cover the raw edges and, voila! Fabulous new lid.

Speaking of staple guns, I should mention  that I had made the suggestion to Mark that perhaps a staple gun that attached to his air compressor might be a good idea. But you know how men DETEST the thought of going to the hardware store to purchase a new tool. So after getting out of the way so he didn't knock me over on his way to get into the truck to drive to Lowe's talking him into the merits of a new staple gun that would also be useful for other projects, we were back from Lowe's in a jiff and continued on with our project.

Moving on: The bottom fabric was one long strip. I measured the length and width of the old fabric, cut two pieces of the new fabric (matching the pattern), sewed one seam. Oops. I just said there was no more sewing involved. Okay. I had to sew these two pieces together to get the length I needed to go all the way around the outside. We kind of centered the fabric from top to bottom around the outside circumference of the bottom, so there was about an equal amount of fabric to fold around to the inside at the top of the box for stapling, and the same to fold under and staple on the bottom.

Hmmm. I'm beginning to like all these power tools!

Added the hinges on the back and screwed the legs back in (even that pesky "broken" leg).

Ready to see the finished project?

In its new home: my sewing room:
Want to see the best part? I KNEW this was the project for me when I opened it up and found this little plastic tray, which meant that it was a....

SEWING CHEST!!! I would have gladly paid $10 for this little beauty. I almost feel guilty that I got it for $2.

Almost...

Friday, March 25, 2011

Extreme Makeover--Blog Edition

The word "extreme" may be, well, a little extreme. But Live a Colorful Life has a brand new look. I hope you like it as much as I do!
It was designed by the lovely Julia, who lives in...wait for it...Berlin!

How did this happen, you ask?

If you read Lily's Quilts, you will have noticed what a fabulous blog header she has.
I asked her about it and she kindly provided Julia's contact information.

Along with having her own fabulous blog header,
Julia also designed the logo for the Berlin Modern Quilt Guild.
We have emailed back and a forth quite a few times (the internet really make the world a rather small place). There may be some minor tweaks that take place over the next few days, but I'm so happy with the results so far!


So welcome to the colorful new look at Live a Colorful Life. And also look for info on a new series that will be starting soon.


In the meantime, I hope to spend some quality time in my sewing room this weekend. What will you be doing in the next couple of days?

Friday, November 5, 2010

Whose idea was this anyway? Part 2

If things have seemed quiet around here, it's because I have been painting. You know how you start one project and then it leads to another? and another? Since everything was out of the sewing room and dining room for the new flooring, and they both needed to be painted, I started Wednesday night with the sewing room. I even painted over my beloved Kermit-the-Frog-green wall.

I'm kind of sorry to see it gone, but there is so much clutter colorful fabric in the sewing room that I was ready for the serenity of the grey walls. Yesterday I painted the dining room the same lighter grey as three walls in the sewing room, and then I decided I was so over the sponge-painted walls in the entryway which connects the two rooms, and painted them the lighter grey as well. It was a little too close for comfort with the amount of paint. I had a little left in the bowl I used for cutting in, but the roller pan was dry.

I previously had written quotes on my sewing room walls. Mark wants them back. Maybe....or maybe not...or maybe some new ones. Not sure yet.
 

The new floors are beautiful!

And pay attention to this picture. My sewing room will never look this neat again. But I can hardly wait to settle in and start sewing. And just as soon as I can find my charm packs, I'll try to catch up with this.

Monday, November 1, 2010

Whose idea was this anyway?

For a while now we (and by that I really mean me) have been thinking about replacing the carpet in the dining room and sewing room with laminate flooring like we have in the rest of the house. Problem number 1: the line of flooring we installed about five years ago is no longer being made. Well, the flooring is still being made, but not the same color. We don't like any of the new colors. Or the new "wood" they are carrying. So we went with another company, slightly different color next to what we already have. Oh well...

Today I moved everything out of all the furniture that has anything stored in it. Dining room question: do I seriously need all these glasses? Uh, no. Sewing room questions: do I really need all this fabric? Duh, yes. It took me 1 1/2 hours to move all that stuff out of the china hutch, the armoire (do I really need all these Christmas decorations?), and then moved all my sewing items. Oh, yes, and all that fabric. It took the guys about fifteen minutes to move all the furniture. Okay so there was one of me, and five of them. I'm giving me some credit...

My office:

The guest room:
 And the L-shaped hallway:


Whose idea was this again?

Oh, yeah. Now I remember.

It was mine...

Saturday, November 7, 2009

Mirror, Mirror, on the wall

Mrs. Limestone from Brooklyn Limestone did a post on upcycling, wondering whether her readers upcycle things themselves and leaving a link to post their own upcycled projects.

Well, as a matter of fact, Mark and I have quite a few upcycled projects around the house. Here is the way it usually goes down. I drag stuff off the trash heap during our annual city cleanup...and he does most of the actual upcycling. And those pieces of furniture are definitely my favorites.

A few years ago we remodeled our master bathroom. We had one of those plain mirrors. You know the kind--no nice frame around it, just held up with little plastic clips. We definitely weren't going to use it in the new bathroom but we also wanted to keep a memento from the old bathroom. Luckily enough (right, Mark?), I had seen a great idea on HGTV. We bought one of those cheap doors from Lowe's--the kind you could easily punch your fist through--which was the same width as the mirror. Got different kinds of molding and a beautiful wooden medalion. Painted the door white, glued the mirror on with liquid nails and then trimmed it out with the molding.

I know it probably sounds this was a joint project. Actually my part was the idea phase. Mark did the actual work on this one.

It turned out great. We have it attached to a wall in our bedroom.

Taking pictures of a mirror...wow, that's a toughie. It's not like you can stand in front of it and snap the picture. Well, you could do that, but then all you would really see is a picture of me taking a picture of the mirror. So, apologies in advance for the photography. (And if any of you have better solutions on photographing mirrors, let me know, because I want to share the redo of our main bathroom, but keep getting hung up on the whole mirror/picture dilemma.)