Showing posts with label gumpaste flowers. Show all posts

Sunday, May 15, 2011

Signs of Spring!


This beautiful magnolia tree is in full bloom.  This is on my "to do" list as something to embroider. 


My sugar partner and I made these small daffodils for an order.  Their stems are hanging below the apple tray.


These are sugar pansies in the first stages.  They still need to be dusted and steamed and their little faces painted.  I'll post the "after" photo next week.


Tuesday, March 22, 2011

Canada Blooms


This is the cake that members of CSSA (Canadian Society of Sugar Artistry) made for the Canada Blooms show.  To our great surprise our booth won "Best Booth in the Show" 


These are the peonies that my friend and I helped to make and I posted about a couple of weeks ago.


CSSA members also made this cake to celebrate the Genie Awards which are given out to recognize the best of Canadian cinema by the Academy of Canadian Cinema and Television that was held during the week of Canada Blooms.  


The cake was in a very pretty setting sitting beside an orchid "tree".


Thursday, February 17, 2011

Flowers - Sugar and Thread


Mary Corbett's Needle & Thread arrives in my e-mail inbox every day.  She asked the question: "Do you have other crafts and hobbies that you pursue, in addition to embroidery?".  Yes I do, my other wonderful hobby is cake decorating, especially making sugar flowers.  Here's examples of some that I have made.


Here are sugar calla lilies, and underneath calla lilies in stumpwork 


These are sugar hydrangeas


And here and below are stumpwork hydrangeas


This is a sugar cherry blossom tree


A silk ribbon rose tree


A sugar wild rose, or briar rose


And a silk ribbon rose


These are sugar hybrid tea roses


And these are ribbon roses

Sil


And finally some sugar pansies just waiting to be included in a spray for a cake.


Silk ribbon pansies


One thing I realize is that I love flowers - sugar, silk and real!

Tuesday, March 31, 2009

Sugar roses


Sugar roses for a Christening cake this weekend. It's amazing to see these little guys take shape over a couple of hours. They are not finished yet, they still need that little seed bud under the calyx, dusted with petal dust and steamed, and the wires wrapped. I'll post a photo of the finished sprays.

Saturday, January 3, 2009

Gumpaste Tulip Tutorial

Finally! The tulip tutorial. The petals, pistil and stamens need to be in proportion to each other. For the petals I am using an oval cutter 2 1/2" long by 1 1/4" wide. The pistil starts at the base of the petals and is about half the height of the petal. The stamens are a little shorter than the pistil and are bent away from it. A real tulip below.


  1. The stamens. Make 6. Cut six 3" pieces of #32 white covered wire. Bend the wire over about 3/4" as shown in the photo below. Moisten this part with egg white or gum glue and dip in something like corn meal to resemble pollen. (I used a mixture of gelatin powder and yellow petal dust.) Let dry.

  2. The pistil. Cut a length of #18 covered wire. This will be the actual stem of the tulip. Colour some gum paste a very light green. Moisten the end of the wire and work the paste to cover the top 2 1/2" of the wire. Pinch the top of the paste into three, as in the photo. Leave upright to dry. 
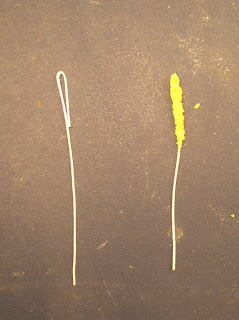
This photo is of my oval cutter and the pistil.

  3. Petals. Make 6, three should be slightly narrower. Colour some gumpaste the shade you want your tulips. Roll out thinly on a grooved boardTurn paste over and cut out petal. Moisten the end of a 4" length of #28 covered wire and push into the raised portion of the petal. Tool the petal to thin out the top edge. Vein each petal. I have an Aldeval tulip veiner which works well.

  4. Make at least one extra large and small petal in case of breakage. So for one tulip make 4 large and 4 small petals. Gently push petals into a dessert spoon and leave to dry at least overnight.


Next I dusted the petals with a slightly darker red, just enough to bring out the veins. I also brushed a little black at the base. It's easier to dust before the tulip is assembled. Use green florist tape to tape the six stamens to the pistil;


  1. Tape the 3 smaller petals evenly around, to the base of the pistil. Tape each one separately so that they will stay in place and not slide around.


  2. Tape the 3 larger petals in between the smaller ones evenly around to the base of the pistil;

  3. You may want to add another one or two lengths of #18 wire to the stem to make it more like a tulip stem which is fairly thick. This is the finished tulip, dusted and steamed.


Leaves I rolled out a large piece of green paste and cut out the leaves freehand. You should leave a thicker piece from the base of the leaf about one third of the way up the middle to hold a wire. I also veined the leaves with my yellow rolling cutter, and the edge of a knife. Just don't press hard enough to thin the paste. Dry on crinkled tinfoil to give the leaves some movement. Dust and steam. About a quarter of the folks who visit my blog do so by googling "gum paste tulips". I would love to know if you found the tutorial useful.


FRILLY TULIP

Note added 25th Feb. 2010:   I have a post on my blog showing how I made a frilly petalled tulip.  Click here for the link.

Monday, December 15, 2008

Gum paste tulips


In the Fall I received an order for tulips for a wedding cake. This is how they looked. If anyone wants a tutorial on them, I'll be happy to do it for you. If the tutorial isn't following this post, please go to the side bar and search the label for tulip tutorial. Click on it and this post and the tutorial will now be on your screen.

Wednesday, September 3, 2008

Wednesday is Cake day!


For a few years now my cake friend Verdie and I have saved Wednesday afternoons to play around with sugar!

Today we had a fun day first of all finishing off white roses and leaves for an October wedding.


After that we decided to try making a flower that neither of us had tried before. It was pictured on a wedding cake in one of our books, no name, no instructions. We thought it was a gardenia, but it turned out to be frangipani.

Here's a quick tutorial on how to make this flower:

I used an orchid petal cutter. The petals are quite waxy, so roll the gum paste out fairly thickly. Tool the edge just slightly.

Fold the petals in half and slightly twist them.


Brush a little water on the bottom on each petal and layer them, one on top of the other. Fold the two outside petals around to join.

Adjust petals, and pinch off any excess paste from bottom. At this point you can push a moistened hooked wire into the bottom of the flower. Here are our first attempts. When they have dried, we'll dust the middles cream and steam them to give a nice sheen. These are without wire so will be attached to a cake with royal icing.